
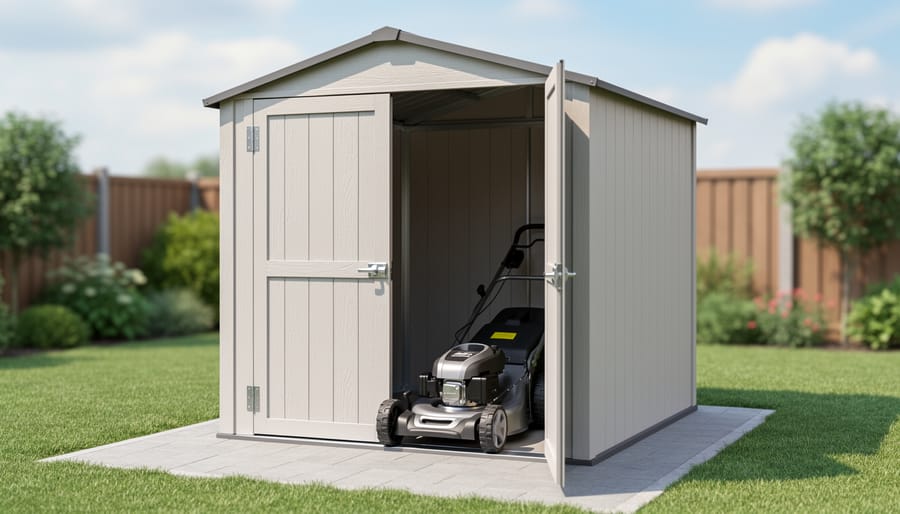
Building a small storage shed for your push mower protects your equipment from Canada’s harsh weather while keeping your yard organized. You can construct a simple lean-to or freestanding shed using basic carpentry skills and materials commonly available at hardware stores. The project requires proper site preparation, a level foundation, and weather-resistant construction to withstand seasonal temperature swings and precipitation.
For Canadian farm and landscape operations, even a compact mower deserves proper shelter. Exposure to rain, snow, and UV radiation degrades engines, corrodes metal components, and shortens equipment lifespan. A dedicated storage solution prevents rust, keeps fuel systems dry, and ensures your mower starts reliably when you need it.
The size of your shed depends on your mower’s footprint and whether you plan to store fuel cans, tools, or accessories alongside it. Most push mowers fit comfortably in a structure measuring 4 feet by 6 feet, though adding extra width simplifies access and provides room for growth. Consider local building codes before construction, as some municipalities require permits for permanent structures exceeding certain dimensions. Temporary or portable sheds often bypass these requirements, making them practical for renters or those seeking flexibility.
This guide walks you through material selection, foundation options, frame assembly, and weatherproofing techniques tailored to Canadian climates. You’ll learn how to verify structural integrity and ensure your finished shed provides years of reliable protection.
What You’ll Need: Tools and Materials
Building a small push mower shed requires basic carpentry tools and readily available materials. Gather everything before you start to avoid mid-project trips to the hardware store. The exact quantities depend on your shed’s dimensions, but a typical 4′ × 6′ structure follows this pattern.
Essential Tools:
You’ll need a circular saw or handsaw for cutting lumber, a cordless drill with bits for pilot holes and driving screws, a carpenter’s level (at least 24″ long), a tape measure, a framing square for ensuring 90-degree corners, and a hammer. A chalk line helps mark straight cuts, and work gloves protect your hands. If you’re working with pressure-treated lumber, wear safety glasses and a dust mask when cutting.
Materials Breakdown:
- Foundation: Concrete blocks (8-12 for a small shed) or crushed gravel base; landscape fabric to prevent weed growth
- Framing: 2×4 lumber for floor joists, wall studs, and roof rafters; 4×4 posts for corner support if desired; ¾” plywood for floor decking
- Exterior: T1-11, vinyl, or cedar siding panels; your choice of roofing material (asphalt shingles, corrugated metal, or rubber roofing)
- Roofing Underlayment: Tar paper or synthetic weatherproofing membrane; drip edge flashing for roof perimeter
- Hardware: 3″ exterior-grade screws; 16d galvanized nails; door hinges (heavy-duty for outdoor use); door handle or latch; metal corner braces for added stability
- Weatherproofing: Exterior wood stain or paint; silicone caulk for sealing gaps; vent covers (2 minimum for air circulation)
Climate Considerations for Canada:
Choose pressure-treated lumber rated for ground contact for any framing that touches the foundation. Metal roofing sheds snow more easily than shingles in regions with heavy snowfall, though it costs more upfront. If you’re in a wet climate like coastal BC, invest in quality weatherproofing membrane and ensure your siding choice resists moisture. Prairie builders should account for wind exposure when selecting roofing weight and fastener quantity.
Buy lumber that’s been kiln-dried or allow green lumber to acclimate for a week before assembly to minimize warping as it dries.
Safety and Site Preparation Warnings
Before you start building, take time to assess your site and understand the risks. Poor preparation causes injuries and costly mistakes that could delay or ruin your project.
Check for underground hazards first. Gas lines, electrical cables, water pipes and phone lines often run through yards at shallow depths. Hitting one with a shovel or post-hole digger can cause serious injury, service disruptions and repair bills. Most Canadian provinces offer free utility locate services, use them.
Power tool safety matters throughout this build. Wear safety glasses when cutting or drilling, use hearing protection with loud equipment, and keep extension cords away from wet conditions. Circular saws and drills cause hand injuries when operators rush or work tired. If you’re unfamiliar with power tools, consider taking a basic workshop safety course or watching instructional videos first, some principles overlap with solar wiring tips where tool safety prevents electrical hazards.
Lift materials properly to avoid back strain. Lumber and roofing materials get heavy quickly. Bend at the knees, keep loads close to your body, and get help with anything awkward or over 50 pounds. Don’t work alone on tasks like raising wall frames.
Weather creates real dangers. Avoid building in high winds, rain or extreme cold. Wet lumber is slippery, cold temperatures make materials brittle, and wind can turn plywood sheets into sails. Canadian winters demand extra caution, frostbite and hypothermia set in faster than most people expect.
If your site has significant slope, unstable soil or drainage problems, consult a professional before proceeding. The same applies if you’re uncertain about structural requirements or local building codes.
Step-by-Step Installation Process
Step 1: Choose and Prepare Your Location
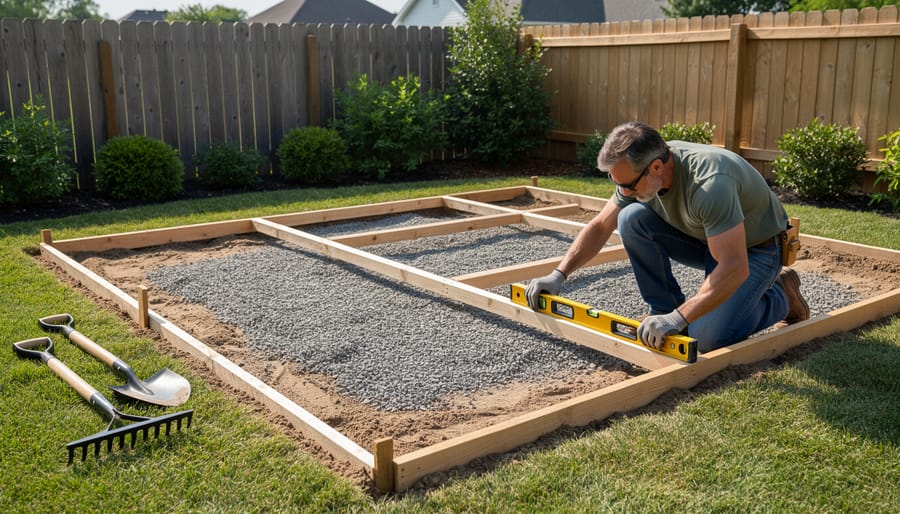
Pick a level spot at least six feet from property lines and away from low areas where water pools during spring thaw or heavy rain. Face the door toward your most common approach path, if you’re storing a mower you use on the back lawn, don’t position the shed entrance facing the front driveway. Morning sun exposure helps dry off moisture from overnight dew, which matters more than you’d think for preventing rust on metal components.
Check overhead for tree branches that could drop limbs during ice storms, and look down for roots that’ll heave your foundation over time. If you’re working near electric lines or planning to add a solar fence charger later, mark those runs now to avoid conflicts.
Clear the footprint plus two feet on all sides. Remove sod, rocks larger than your fist, and any vegetation. Rake the area smooth, then use a four-foot level on a straight board to check for high spots, you want variation under half an inch across the entire base.
Step 2: Build Your Foundation
Your shed’s foundation determines how well it handles freeze-thaw cycles and spring runoff. A gravel base works well for most push mower sheds: dig out 4-6 inches of soil, add landscaping fabric, then fill with compacted three-quarter-inch crushed stone. This approach drains freely and won’t heave in winter. Concrete blocks offer a quicker setup, simply level the ground, place blocks at corners and mid-points, and shim as needed. They’re repositionable but can shift on soft soil. Pressure-treated skids (4×4 or 6×6 timbers) create an elevated platform that keeps the floor dry and allows air circulation underneath. They suit uneven terrain but need blocking to stay level.
Whichever method you choose, check level in both directions before building on top. A foundation that’s off by even half an inch will complicate every subsequent step and may cause door binding or water pooling.
Step 3: Frame the Floor
Start by cutting your floor joists to length, typically 2×4 lumber spaced 16 inches on centre works well for a small shed. Lay the outer frame first, then add the interior joists perpendicular to your foundation supports. Check that corners are square by measuring diagonally from corner to corner; both measurements should match exactly. Consult your local building code for maximum floor joist spans based on your lumber size and spacing. Secure each joist with two 3-inch screws or nails at every connection point. Once the frame is assembled and square, cut your plywood decking to fit and fasten it down with screws every 8 inches along the joists, starting from one corner and working across to prevent the sheet from shifting.
Step 4: Build and Raise the Walls
Start by cutting your wall studs to match your shed’s height, typically 6 to 7 feet for a push mower shed. Lay out the bottom and top plates on the ground, marking stud positions every 16 inches on center. Frame your door opening with double studs on each side and a header across the top to carry the load. Assemble each wall flat on the ground, nailing studs between the plates, then check that corners are square before moving on.
With a helper, lift the first wall into position on your floor frame. Brace it temporarily with scrap lumber, then secure the bottom plate to the floor joists with 3-inch screws every 16 inches. Raise the adjacent wall and fasten it to both the floor and the first wall at the corner, driving screws through the corner studs. Work your way around until all four walls are standing. Double-check plumb with a level before final fastening, walls that lean will cause headaches when you install the roof.
Step 5: Install the Roof Frame
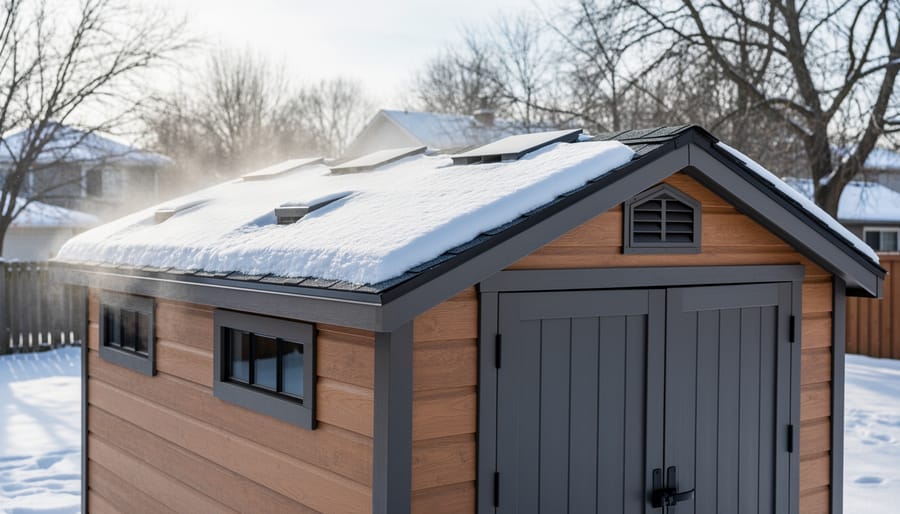
With your walls standing, you’re ready to frame the roof. A simple gable roof suits most small mower sheds, two angled sides meeting at a center ridge provide excellent water runoff and snow shedding for Canadian winters. Measure and cut matching rafters, typically 2×4 or 2×6 lumber depending on your span, ensuring each pair angles properly to meet at the peak. A 4:12 or 5:12 pitch works well for weather protection without overcomplicating the build. Plan for 12-18 inches of overhang beyond each wall to shield siding and prevent water from pooling near the foundation. Secure rafters to the top wall plates with framing nails or hurricane ties, spacing them 16 or 24 inches on center. If you’re adding electrical later, similar to a farm power setup for outbuildings, leave pathways now for wiring runs before sheathing goes on.
Step 6: Add Sheathing and Roofing
With the roof frame complete, start by laying 7/16-inch or 1/2-inch OSB sheathing across the rafters. Space the sheets with a 1/8-inch gap to allow for expansion, and secure them with 8d nails every 6 inches along the edges and 12 inches in the field. This creates a solid base for your weatherproofing layers.
Next, roll out roofing felt or synthetic underlayment from the bottom edge upward, overlapping each row by at least 2 inches. Staple it in place temporarily. This membrane is your primary defense against water infiltration, especially during spring thaw cycles common across Canada.
For the final roofing material, asphalt shingles work well in most regions and install quickly with roofing nails. Start at the bottom edge and work upward, following the manufacturer’s overlap specifications. In areas with heavy snow loads, like Northern Ontario or the Prairies, consider upgrading to architectural shingles rated for ice dam resistance, or opt for metal roofing which sheds snow more effectively and lasts longer in freeze-thaw cycles.
Add drip edge along the eaves and rakes before shingling to direct water away from the wood. Proper overhang (at least 6 inches) helps protect your siding from roof runoff.
Step 7: Install Siding and Door
Start by attaching your siding material from the bottom up, overlapping each course to shed water downward. Cut pieces to fit around the door opening, leaving a one-inch gap on all sides for shimming. Secure the door frame in the opening using a level to ensure it’s plumb, then shim behind the hinges and latch side before screwing it permanently in place. Test the door swing to confirm your mower clears comfortably, you want at least three inches of clearance on each side.
Install trim boards around the door frame and corners to cover gaps and give the shed a finished look. Run a bead of exterior-grade caulk along all seams where siding meets trim, around the door frame, and at corner joints. Pay special attention to the top edge of the door trim where rain naturally runs down.
Step 8: Add Ventilation and Finishing Touches
With your walls, roof, and door complete, installing proper ventilation prevents moisture buildup that leads to rust and mildew. Cut at least two vents, one near the roof peak and one lower on the opposite wall, to create airflow. Secure them with screws and check that louvers face downward to keep rain out.
Add your door hardware next. Mount a simple hasp or barrel bolt for security, ensuring the latch doesn’t catch on your mower when you roll it in. A handle makes opening easier when your hands are full.
Apply exterior stain or paint to protect the wood from Canada’s freeze-thaw cycles. Focus on sealing cut edges where moisture penetrates fastest. Let everything dry completely before storing your mower.
For convenience, screw a few heavy-duty hooks to the wall studs for hanging tools, gas cans, or your mower’s grass bag. A small shelf above the mower stores oil, spark plugs, and maintenance supplies where you can reach them easily.
Checking Your Work and Next Steps
Before you load in your mower, walk through a thorough inspection to confirm your shed will protect your equipment season after season. Start by checking that the structure is level in all directions, place a carpenter’s level across the floor in multiple spots to verify. A sloped floor will cause the door to swing open or shut on its own and can lead to water pooling inside.
Test the door several times to ensure it opens and closes smoothly without binding. Measure the clearance around your push mower when it’s inside; you should have at least six inches on each side for comfortable loading and unloading. Inspect the door frame for gaps that could let in rain or snow, and add weatherstripping if needed. Check that all latches and hinges are secure and operate without forcing.
Examine the roof carefully from the ground and, if safe to do so, from a ladder. Look for any loose shingles, gaps at the ridge, or areas where water might penetrate. Run your hand along the interior ceiling during or shortly after a rain to detect leaks early. Verify that your ventilation openings are clear and unobstructed, good airflow prevents condensation that leads to rust on metal mower parts.
For seasonal maintenance, re-check weatherstripping and caulking each spring and fall, clear debris from around the foundation to maintain drainage, and inspect the roof after heavy snow. If you’re planning larger farm storage projects or notice structural concerns beyond cosmetic issues, bring in a qualified building inspector or contractor. Small problems caught early stay small; ignored, they compromise your entire investment in proper equipment storage.
Common Questions About Push Mower Storage Sheds
What size shed do I need for a standard push mower?
A 4×6 foot shed provides adequate space for most walk-behind push mowers with room for basic hand tools. If you plan to store fuel cans, maintenance supplies, or a small garden cart alongside the mower, consider a 5×7 or 6×8 foot footprint.
Do I need a building permit for a small mower shed in Canada?
Permit requirements vary widely by municipality. Many communities exempt structures under 10 square metres (roughly 108 square feet) from permits, but setback rules from property lines still apply. Check with your local planning department before starting construction.
How do I weatherproof a shed for harsh Canadian winters?
Use pressure-treated lumber for the base, install proper roof overhang to shed snow and rain, and seal all gaps with caulking or weatherstripping around the door. Apply exterior-grade paint or stain to protect wood from freeze-thaw cycles, and ensure roof ventilation prevents condensation buildup that leads to rot.
Should I rent construction tools for a one-time shed build?
Renting makes sense if you don’t own a circular saw, impact driver, or level and won’t use them regularly afterward. The cost savings compared to purchasing quality tools often justifies rental for single projects, similar to how you might approach an outdoor solar install requiring specialized equipment.
Beyond permits and sizing, material longevity depends on your choices and maintenance. Cedar and pressure-treated pine resist rot better than untreated softwoods, though they cost more upfront. Metal roofing outlasts asphalt shingles in snowy regions but requires careful installation to prevent leaks. Plan to reapply protective finishes every two to three years, inspect fasteners annually for rust, and clear snow buildup promptly to extend your shed’s working life.
Building a small storage shed for your push mower protects your investment and extends the life of your equipment. A well-constructed shelter keeps moisture, UV damage, and temperature extremes from wearing down engines, blades, and electrical components. The eight-step process outlined here, from site selection through finishing touches, gives you a straightforward path to creating durable protection without requiring advanced carpentry skills.
Taking on this project yourself saves money and lets you customize the design to fit your specific property and equipment needs. The methods covered work equally well for hobby gardeners maintaining a single mower or small farm operations protecting multiple pieces of seasonal gear. Regular maintenance and proper ventilation will keep your shed functional for years.
If you need construction tools for the build or larger equipment storage solutions for your farming operation, Harvest Salvage offers rental options across Canada. We understand the practical demands of agricultural work and provide reliable equipment when you need it. Whether you’re building one small shed or planning more extensive farm infrastructure, the right tools make every project more manageable and professional.